SA4-PT Practice Test: Forms and Actions for Managing Model Objects
Extra Setup — Important
From this SA forward, the RSpec tests require that ChromeDriver be installed.
How to Start
- Access the GitHub organization’s repositories page.
- Log into GitHub.
- Open the comp-7012-s25 repositories page.
- Create a new repository from the template.
- Click the New repository button at the top-right of the page.
- Fill out the Create a new repository form as follows:
- Repository template: Select
template-sa4-pt. - Owner: Select
comp-7012-s25. - Repository name: Use the form below to generate the name for your repository.
- It is required that your repository’s name precisely follow the format produced by the form.
- Select Private, so that only you and your instructors can access your repository.
- Repository template: Select
- Click the Create repository button at the bottom right of the page.
cdinto your workspace folder.git clonethe repo you created above.cdinto the new working tree.- Open the working directory in VS Code,
bundle install/rails db:migrate && rails db:seed, and begin the practice test.
sa4-pt-hsimpson-1
Task
The aim of this project is enable users to make a playlist of songs (also called tracks). The project already includes a Track model class, as per this class diagram:

In addition to this model class, the project also already includes the following:
- Attribute validations for the
Trackclass - Seeds for the
Trackclass - A
TracksControllerclass - Routes, actions, and view templates for index and show pages
- A root route set to redirect to the index page
- The flash-notification infrastructure described in the Flash Notifications deets
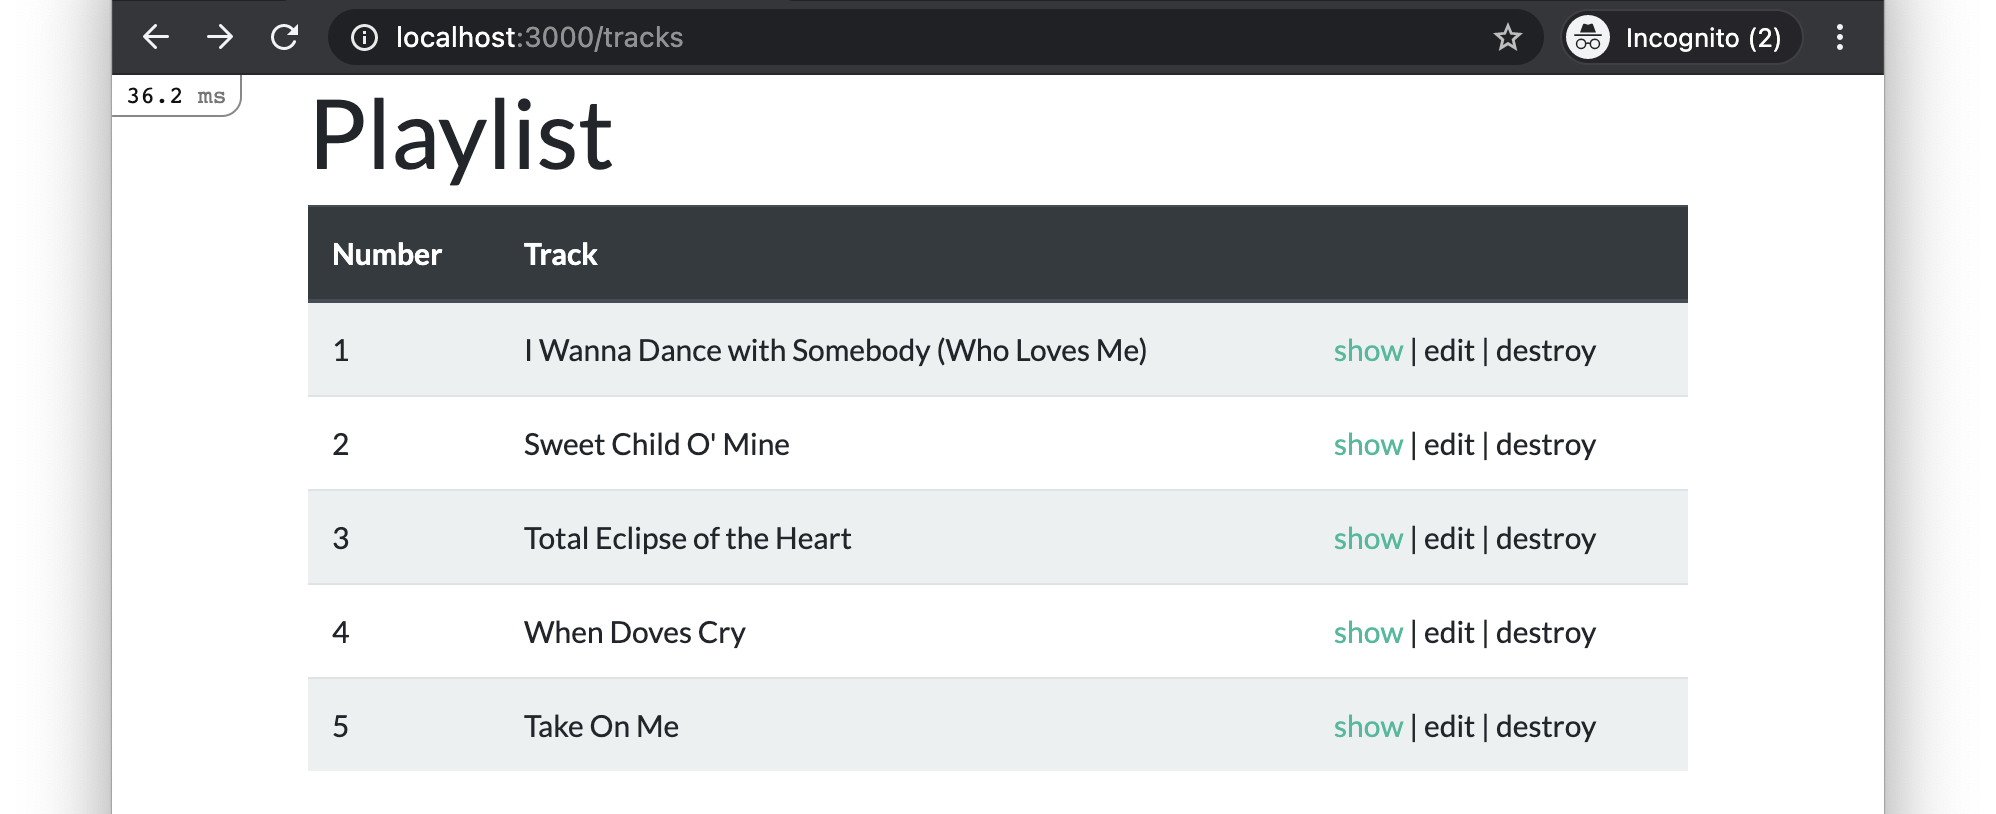
If you initialize and run the app, you will see that the index page looks like this:
And the show pages look like this:

Task to perform: You must add new/create, edit/update and destroy functionality for Track objects.
Detailed Specifications
Existing Functionalities
- Feature: Browse Tracks
- As a user,
I want to see a list of tracks
So that I can choose one to view more details about - Scenario: Viewing the track index page content
- Given I have created two sample Track records
- And I am on the /tracks page
- Then I should see an
h1element with text “Playlist” - And I should see a table with headers “Number”, “Track”, and one empty header
- And I should see two table body rows with the sample records’ order number, title, and 3 links with the format “show | edit | delete”
- And I should see a link with text “Add Track”
- Scenario: Redirecting from the root page to the tracks page
- When I visit the root URL
- Then I should be automatically redirected to the /tracks page
- As a user,
- Feature: View Track Details
- As a user,
I want to see detailed information about a selected track
So that I can learn more about it - Scenario: Viewing a track show page content
- Given I have created a sample Track record
- And I am on its /tracks/:id page
- Then I should see an
h1element with the track’s order number and title in the format like “#[Order Number] [Title]” - And I should see a list of track attributes in a
ulelement containing exactly 2liitems - And I should see an
liitem with the text in the format “Artist: [Artist]” - And I should see an
liitem with the text in the format “Length: [Length in seconds in ‘M:SS’ format]” - And I should see a link with text “Back to Playlist”
- Scenario: Navigating to a track show page from the index page
- Given I am on the /tracks page
- When I click on a track’s show link
- Then I should be on the /tracks/:id page for the selected track
- Scenario: Navigating back to the track index page from the show page
- Given I am on the /tracks/:id page
- When I click on the “Back to Playlist” link
- Then I should be on the /tracks page
- As a user,
New Functionalities
- Feature: Create New Track
- As a user,
I want to add a new track to the playlist
So that I can expand my list of tracks - Scenario: Viewing the new track form page
- Given I am on the /tracks/new page
- Then I should see an
h1element with text “New Track” - And I should see a form with fields “Order number”, “Title”, “Artist”, “Length in seconds” and a “Create Track” button
- Scenario: Creating a new track with valid details
- Given I am on the /tracks/new page
- When I fill in an order number greater than 0
- And I fill in a title
- And I fill in an artist
- And I fill in a length in seconds greater than 0
- And I click the “Create Track” button
- Then a Track record with matching attribute values should be created
- And I should be on the /tracks page
- And I should see a success-styled flash message with text “New track successfully added!”
- And I should see the new track in the track list
- Scenario: Creating a new track with invalid order number
- Given I am on the /tracks/new page
- When I fill in an order number that is not greater than 0
- And I click the “Create Track” button
- Then a Track should not be created
- And I should see an error-styled flash message with text “Track creation failed.”
- And I should see the new track form with error messages indicating the validation failures
- Scenario: Creating a new track with missing title
- Given I am on the /tracks/new page
- When I do not fill in a title
- And I click the “Create Track” button
- Then a Track should not be created
- And I should see a HTML5 validation popup with text “Please fill out this field.”
- Scenario: Creating a new track with invalid length
- Given I am on the /tracks/new page
- When I fill in a length in seconds that is not greater than 0
- And I click the “Create Track” button
- Then a Track should not be created
- And I should see an error-styled flash message with text “Track creation failed.”
- And I should see the new track form with error messages indicating the validation failures
- Scenario: Navigating to the new track page from the index page
- Given I am on the /tracks page
- When I click on the “Add Track” link
- Then I should be on the /tracks/new page
- Scenario: Navigating back to the track index page from the new page
- Given I am on the /tracks/new page
- When I click on the “Cancel” link
- Then I should be on the /tracks page
- As a user,
- Feature: Edit Track
- As a user,
I want to edit an existing track
So that I can update its details - Scenario: Viewing the edit track form page
- Given I have created a sample Track record
- And I am on its /tracks/:id/edit page
- Then I should see an
h1element with text “Edit Track” - And I should see a form with fields “Order number”, “Title”, “Artist”, “Length in seconds” pre-filled with the track’s current details and a “Update Track” button
- Scenario: Updating a track with valid details
- Given I have created a sample Track record
- And I am on its /tracks/:id/edit page
- When I change the order number to a different number greater than 0
- And I change the title
- And I change the artist
- And I change the length in seconds to a different number greater than 0
- And I click the “Update Track” button
- Then the original Track record should be updated to match the new attribute values
- And the total number of tracks should not change
- And I should be on the /tracks/:id page for the track
- And I should see a success-styled flash message “Track successfully updated!”
- Scenario: Updating a track with invalid order number
- Given I have created a sample Track record
- And I am on its /tracks/:id/edit page
- When I change the order number to a different number that is not greater than 0
- And I click the “Update Track” button
- Then the original Track record should not change
- And I should see an error-styled flash message with text “Track update failed.”
- And I should see the edit track form with error messages indicating the validation failures
- Scenario: Updating a track with missing title
- Given I have created a sample Track record
- And I am on its /tracks/:id/edit page
- When I erase the title
- And I click the “Update Track” button
- Then the original Track record should not change
- And I should see a HTML5 validation popup with text “Please fill out this field.”
- Scenario: Updating a track with invalid length
- Given I have created a sample Track record
- And I am on its /tracks/:id/edit page
- When I change the length in seconds to a different number that is not greater than 0
- And I click the “Update Track” button
- Then the original Track record should not change
- And I should see an error-styled flash message with text “Track update failed.”
- And I should see the edit track form with error messages indicating the validation failures
- Scenario: Navigating to a track edit page from the index page
- Given I am on the /tracks page
- When I click on a track’s edit link
- Then I should be on the /tracks/:id/edit page for the selected track
- Scenario: Navigating back to the track index page from the edit page
- Given I have created a sample Track record
- And I am on its /tracks/:id/edit page
- When I click on the “Cancel” link
- Then I should be on the /tracks page
- As a user,
- Feature: Destroy Track
- As a user,
- I want to delete an existing track
- So that I can remove it from the playlist
- Scenario: Deleting a track from the index page
- Given I am on the /tracks page
- When I click the “delete” link for a track
- Then the Track record with that id should no longer exist
- And the number of tracks should decrease by one
- And I should be on the /tracks page
- And I should see a flash message “Track successfully removed”
- And I should not see the deleted track in the track list on the /tracks page
Additional Constraints:
- You must follow the standard Rails conventions:
- Each page must have a path helper following the standard Rails convention:
/tracksistracks_path/tracks/newisnew_track_path/tracks/:idistrack_path/tracks/:id/editisedit_track_path
get /tracksroutes toTracksController#indexpost /tracksroutes toTracksController#createget /tracks/newroutes toTracksController#newget /tracks/:idroutes toTracksController#showget /tracks/:id/editroutes toTracksController#editpatch /tracks/:idroutes toTracksController#updatedelete /tracks/:idroutes toTracksController#destroy
- Each page must have a path helper following the standard Rails convention:
- Links must use the
link_toorbutton_tohelper where appropriate with the appropriate path helper- The
button_tocan be styled withclass: 'btn btn-link p-0 pb-1 m-0', form: { class: 'd-inline' }to match the other links.
- The
- Forms must use the
bootstrap_form_withhelper - 5 seeds must be created as instructed upon seeding
- All HTML tags must be properly closed
- No duplication of
head/style/bodyelements in the rendered HTML
Note: Italicized requirements will be manually confirmed by the graders.
Testing Your Work with RSpec
Each of the feature stories above corresponds to an RSpec feature spec. These tests (and others for the additional constraints) have been provided in the repository to help you check whether your implementation meets the requirements.
Recommended Workflow
- Read through the detailed specifications first. Understand what is required for each page and scenario.
- Approach 1 - for those familiar with Test-Driven Development (TDD):
- Run
rspec spec/featuresto execute the feature tests. - Try to write the minimum amount of code needed to make each test pass.
- Watch the tests fail and pass as you meet each requirement.
- At the end, run all the provided tests with the
rspeccommand to check if everything passes.- Note that not all tests are feature tests, so it is necessary to run
rspecat the end to ensure that all tests are run.
- Note that not all tests are feature tests, so it is necessary to run
- Run
- Approach 2 - for those less experienced with testing:
- Work through the specifications step by step, ensuring your implementation meets each requirement.
- Once you’ve completed your implementation, run all the tests with the
rspeccommand to check if everything passes.
Either of the above approaches is fine, as long as all tests pass by the end.
How to Submit
Once you’ve completed the task and confirmed that all tests pass, perform the follow steps to submit your work.
- Commit your changes and push them to GitHub.
git add -Agit commit -m "Completed SA4-PT Practice Test"git push
- Take screenshots.
- Open your Rails app in the browser and take the following screenshots:
- sa4-pt-01: The Tracks index page (
/tracks). - sa4-pt-02: The Track show page for “Total Eclipse of the Heart” (
/tracks/3). - sa4-pt-03: The Track new page (
/tracks/new). - sa4-pt-04: The Track edit page for “Total Eclipse of the Heart” (
/tracks/3/edit).
- sa4-pt-01: The Tracks index page (
- Ensure that your desktop background or terminal prompt with your unique username is visible in the screenshot.
- Open your Rails app in the browser and take the following screenshots:
- Submit to Canvas.
- A Word DOCX that contains:
- The link to your GitHub repository where your code is hosted.
- The screenshots.
- A Word DOCX that contains: